
Below (Left to right), weighing barley to be malted. This is a 12 pound patch -- 12 pounds of dry barley at the beginning). Malting reduces the weright of the barley a bit, so the end product will weigh less than 12 lbs. Adding cool tap water.


Left: Floating off the chaff. There will likely be some chaff in most barley you will buy or grow yourself. This is the chance to make sure it does not make it into your malt. Right: Steeping barley in cold water for 8 hours. I use 2 pots to make a 12 pound batch of malt.


Straining steeped barley
 and letting it rest for a few hours before steeping again. The goal is to let the water penetrate the starchy parts of the barley corns and begin the sprouting process. I have read that you can suffocate the grains if they are underwater for more than 8 hours hence the drain and rest process. I cannot corroborate this, but still give the grain a couple hour's rest after each 8 hour steeping.
After steeping and straining twice, transfer the barley to a trug (I use a plastic mortar basin bought from Home Depot) and keep it moist but not sodden. The grains should be chewey when, well, chewed at this stage. Turn the barley frequently and keep it relatively cool. Ideally between 50 and 60 degrees, but 70 is ok. The goal is to avoid mold while maintaining temperature and moisture that facilitates sprouting, so not too warm and not too wet, but not too dry either. This process will go on for between 1 and 4 days. Some sources say it may take 14 days for barley to sprout! In my experience it is much shorter -- in the neighborhood of 1-3 days to sprout and 4-6 days for the whole malting process.

No aspiring maltster is going to want to hear this, but it helps to get up at least once at night to check the moisture level and stir the barley. As you get out of bed at 3 AM it helps to mumble to yourself, "Time to make the malt. Time to make the malt." like the guy in the old Dunkin' Donuts commercials. It takes 2 minutes to stir and adjust moisture, if needed.
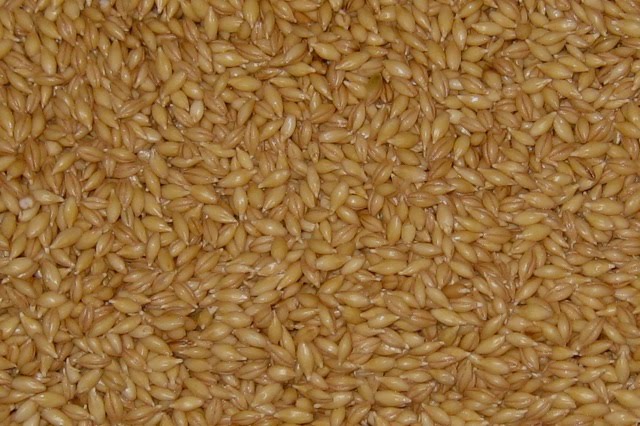
Barley two days into the malting process (below). The acrospire (roots) are starting to show. They are the little white shoots at the pointy end of the grains. This is called chitting.
Barley 3 days into the malting process. The acrospires (the visible little white roots) are prominent. The shoot under the husk (which would become the grass of the barley plant) is visible under the husk at this stage, but should be less than 1/2 the length of the grain.

Barley ready for kilning (below) . Notice the shoots starting to emerge from under the husks of some of the grains. I read that you want to kiln when the shoots (not the thin white roots) are the full length of the grain, but still under the husk. At this stage, some shoots are emerging from the husk, some are half the length of the grain, and others are in between. Its a judgment call. I judged this barley to be ready to kiln.

Wet malt going into the dehydrator and oven (below). I find the dehydrator works much, much better, probably because it also has a fan that draws moisture out of the equation. With the dehydrator, I can also keep the temperature around 117 degrees (and always below 125) with great accuracy so as not to kill the enzymes in the barley that facilitate conversion (note the electric thermometer with cable). Unfortunately, the dehydrator is not big enough to kiln a 12 pound batch of malt. Kilning like this takes about 12 hours. I have plans to build a much larger kiln that can handle as much as a bushel of barley (48 pounds) with a thermostat, space heater, and electric box fan. I bought the thermostat and will eventually get around to building the kiln. If it works, ramping up the scale of the rest of the process should be relatively straightforward. limited kilning capacity is the restraining factor at this point.


The finished product. Maybe not as pretty as bought malt, but something to be proud of, especially of you grew the barley yourself.


Great blog! I'm growing barley this spring for sure! How many pounds of barley did you get from your plot?
ReplyDeleteLCM
this is awesome, did you use feed barley or barley meant for malting? I can but 50 pounds for under 8 dollars at a mill 1 mile away
ReplyDeleteThanks, Ian. I looked all over for two row winter malting barley seed and struck out, so I managed to get 10 kilos from a distributor in Germany. The strain is called Wintmalt, which has been discontinued. Apparently, it was not better than the already approved varieties. The grains of Wintmalt seem larger, more uniform, and brighter (tan and not dingy) than the feed barley I can get at the feed store nearby (mine is $11 for 50 pounds).
ReplyDeleteI bought "Conlon" 2-row malting barley from Johnny's Selected Seeds - just harvested my crop yesterday. Only one stray 6-row plant in the whole batch.
ReplyDeletehttp://www.johnnyseeds.com/
Totally helpful, thanks for a great post with great pics! Have you ever malted rye?
ReplyDeleteThis is one of the easiest to follow, most straight-forward malting articles I have come across. Great job!!
ReplyDelete